A cura di: Ravi Poonia (team hackerhood)
In this article, we are going to explore different techniques like Packing, Encryption and obfuscation used by malwares authors to bypass the antivirus software. During this article we will mainly focus on Packing a malware and techniques used to unpack a malware. During this article we will diving into the following sections:
● Exploring the packers.
● Identify the packed sample.
● Performing the manually unpacking of a packed malware sample.
Exploring the Packers A packer is a tool that packs together the executable file’s code, data, and sometimes resources and also it contains the code for unpacking the program.
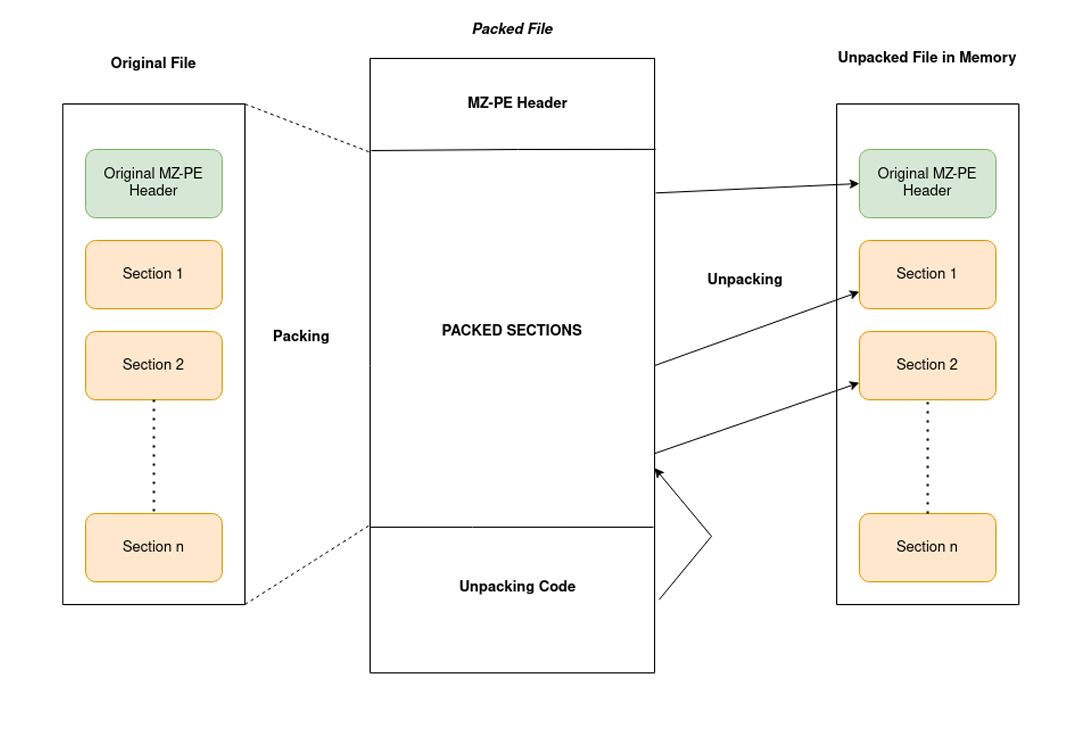
The above image denotes the process of packing and unpacking the malware sample.
Packers may help malware authors to hide the malicious content or code behind this compression layer. This code only gets unpacked and executed once the malware is executed, which helps the malware authors to bypass the static signature based detection. There are multiple tools that can pack/encrypt the binary executables files, but every tool has a different purpose.
● Packers: These programs are mainly used for compressing the binary executable file thereby reducing their total size. Since their purpose is compression, they were not created for hiding the traits and are not malicious on their own. Therefore, they can’t be the indicators that the packed file is likely the malicious file. Some well known packers are UPX, ASPack, the enigma protector, MPRESS, Exe packer etc.
● Legal Protectors: The main purpose of these tools are to protect against the reverse engineering attempts for example, to protect the licensing system of shareware products or to hide implementation details from competitors.
● Malicious Encryptors: Similar to the legal protectors, their purpose is also to make the analysis process harder. However the focus is different to avoid the antivirus detection, you need to bypass the sandboxes and hide the malicious traits of a file. All of these above tools are called packers and may include both protection, compression and bypass detection capablities.
IDENTIFYING A PACKED SAMPLE
Checking static signature Using PE Tools
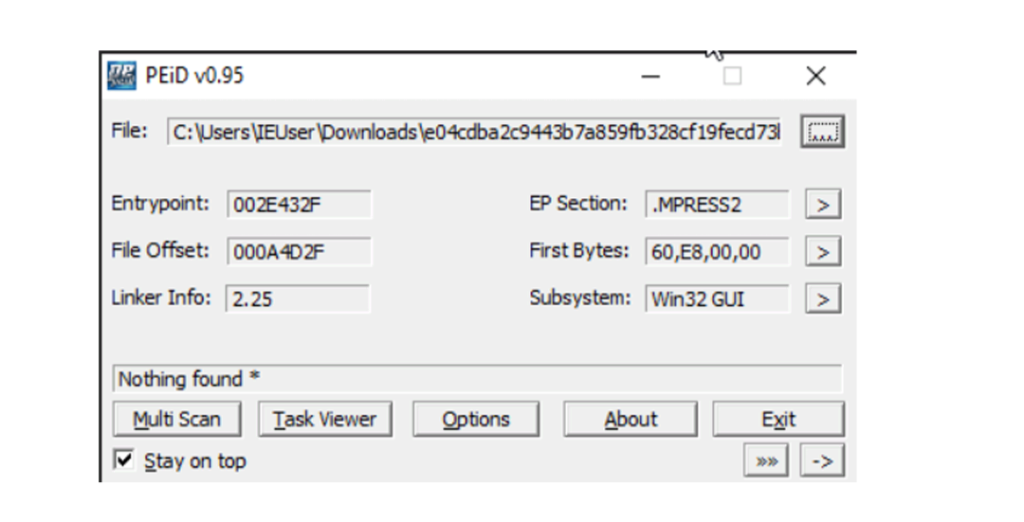
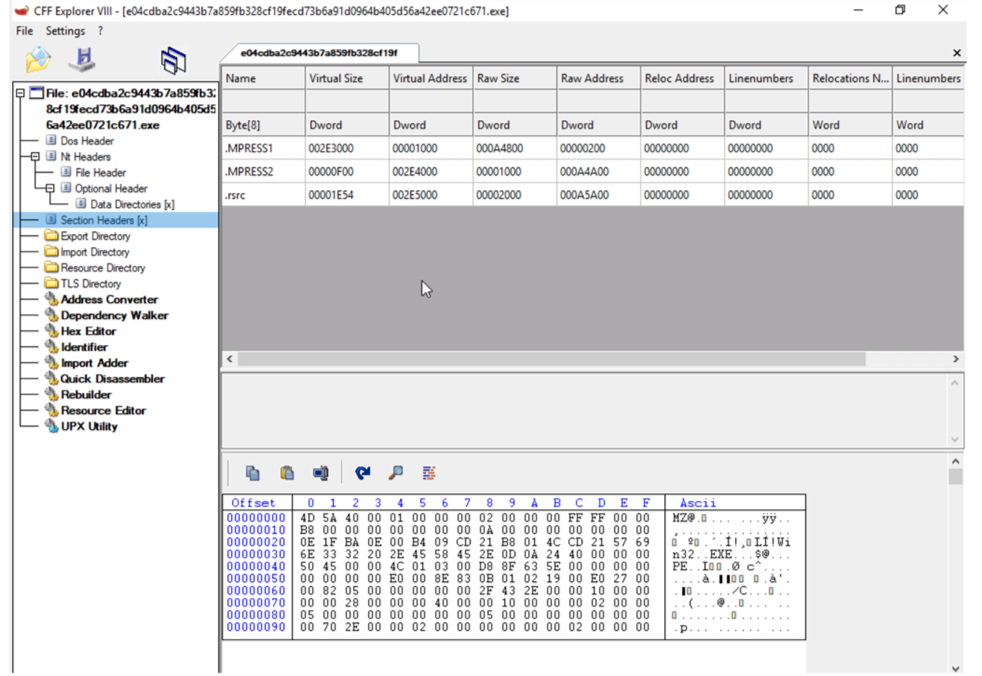
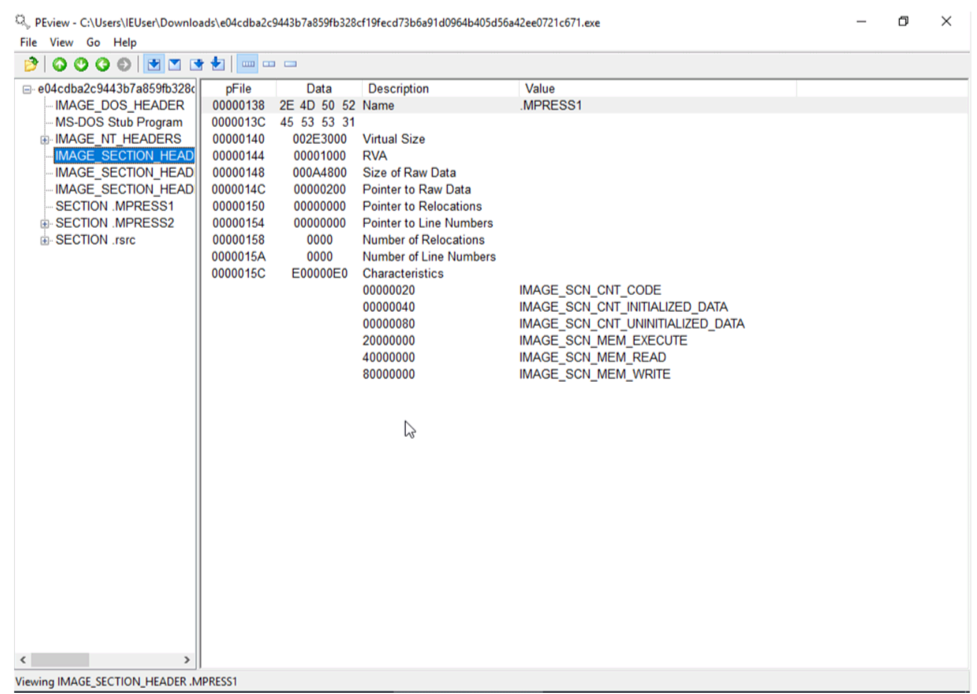
The first way to identify whether a malware sample is packed is by using static signatures. Every packer has some unique characteristics that can help you identify the malware sample. For example by checking the section name of the binary executables as in case of UPX packer, it renames all the section names to UPX1, UPX2 and so on. While the ASPack packer names the last section .aspack. Following Tools used for identifying the packer that was used for compress the file: otherwise, they will identify the compiler that is used to compile this file.
● PEiD
● CFF Explorer Analyze one of the malware using the above tools. So the packer used in the sample is MPRESS packer.
Analyzing PE Section Names
Using Stub Execution Signs
Detective a small import table
Manually Unpacking the packed Malware sample
The unpacking done by the automatic tool is much faster than the manual unpacking but it doesn’t work with all the packers, encryption or protectors. One of the manual approaches is dumping the process memory by running the binary executable, hoping that the unpacked module is available there. But there are many disadvantages to using this approach.
● Original loader might unpack the sample to allocated memory and inject it somewhere else and free the process memory so it won’t be part of the memory dump.
● Relocation of the import table and change the physical address of each section to be equal to the virtual ones might be required in order to run the sample.
Memory Breakpoints on execution
There are a lot of packers which encrypts the first few sections and the unpacker stub unpack those sections and transfer the control to the original entry point for the application to run normally. Steps to follow the unpacking of the sample.
Setting the breakpoints Hardware and memory breakpoints could be used but in case of hardware breakpoints on execution can only be set on maximum 4 bytes that means you should know the OEP to be able to set one. So the effective solution is to use the memory breakpoints on execution of a binary file. First changing the first’s section memory permission to Full Access from READWRITE in ollydbg or x86dbg debuggers.
Turn ON DEP(Data Execution Prevention)
If the memory permission doesn’t include the EXECUTE permission therefore need to enforce the DEP(Data Execution Prevention) on.
Set Memory breakpoint Then the set breakpoint on the VirtualProtect API that might change the permission of the section as if stub try to call VirtualProtect API to change the permission of the section the debugger will set the breakpoint. And then change the New Protect value to READONLY or READWRITE and remove the execute bit from it.
Comments are closed